PiPPi | 3 years ago | 7 comments | 6 likes | 1.1K views
michiel, Alex-Raymond T., liuyongcai and 3 others like this!
The difference between "Normal"-effect texturing and "Displacement"-effect texturing and more.
Yes, this is a very very loong post from a layperson.
____
I'm having fun as I'm learning new stuff about PBR, UV mapping/texturing, and more pretty much every day now.
The problem is that the more I learn, the more it opens up to new possibilities and in that it gets more and more complicated. I'm now touching on texturing for game engines and such which is way overkill.
Interesting and fascinating as that is, it's not for me. My goal is of course to take the basics of 3D texturing into BluffTitler for practical use.
So here's an example show that I hope works in explaining some of what I do with texturing and BluffTitler.
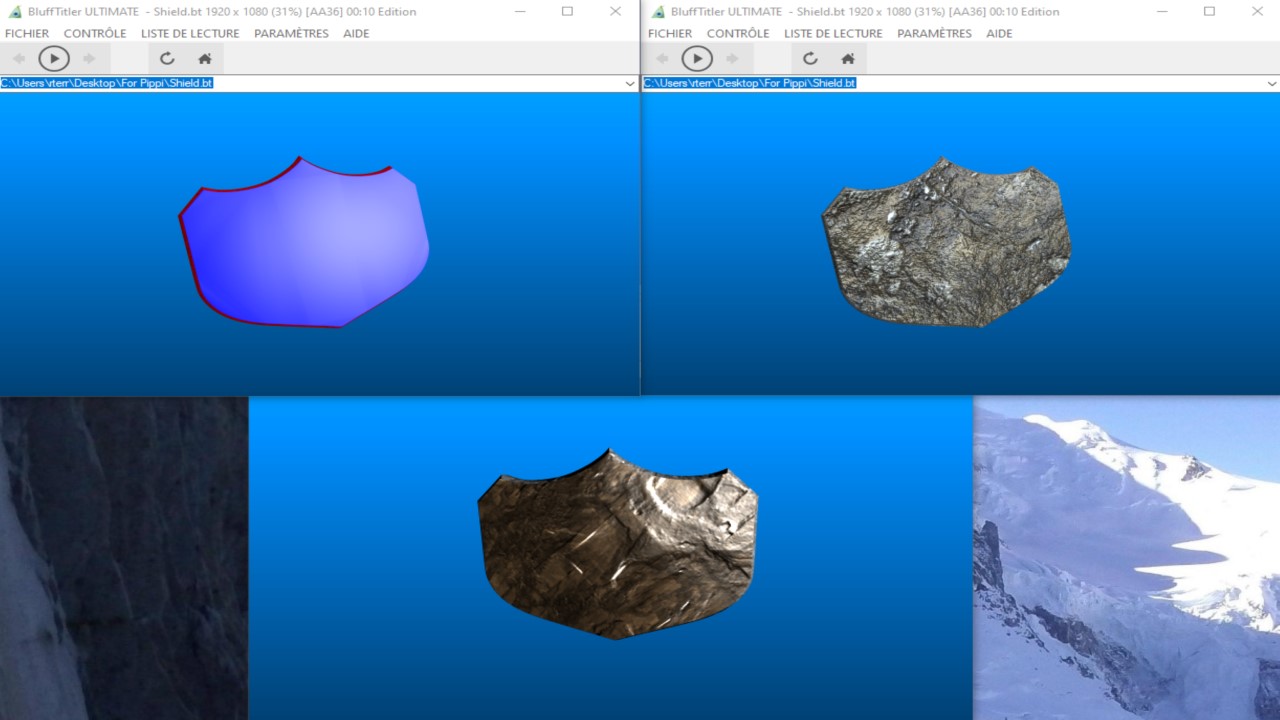
I created a model that in turn consists of two submodels.
- The full model is a stepped 3D shield.
- Submodel 2 is the smaller front shield and Submodel 1 is the back shield.
- I have used "displacement texturing" for the brick wall on Submodel 2 and
"normal texturing" for the pitted surface on Submodel 1.
I did this earlier with a single model without submodels just for showing off UV unwrapping. Doing it this way with "traditional" multi-submodels of course makes for better ease-of-use in setting up different textures for different parts.
I still use pre-BluffTitler UV mapping for the model for things like rotating and scaling a texture. In addition to that I use separate software for creating and modifying the texture maps. That makes for being able to control the "intensity" of the maps before bringing them into BluffTitler for fine-tuning. For that kind of texturing I'm testing free software like Quixel Mixer & Bridge, Materialize and AwesomeBump.
Moving on and repeating myself:
- Submodel 1 is using the texture "Normal"-effect.
"ColourmapNormalmapCubemap.cfx". The pitted surface.
- Submodel 2 is using the texture "Displacment"-effect.
"ColourmapDisplacementmapCubemap.cfx". The brick wall.
This works great but it also shows the difference between the two texturing effects.
Simplifying it immensely here but the "Displacment"-effect gives a more "real" visual 3D effect so to speak. The "Normal"-effect of course also gives a nice visual 3D effect but there is a subtle difference that I think is important.
The difference is obvious in this show. Check out the very start of the video and the Brick Wall submodel. At 2 seconds I put in a circle to highlight that the 3D texturing effect for "Displacement" extends outside of the model. That effect will also create shadows on other objects and surfaces based on that and you can also se that "true 3D effect" in the mirror below as the shield turns.
Submodel 1 is textured using the "Normal"-effect. It works great too (it can be of course be in full color), that texture reacts on lighting etc. But the 3D "Normal" effects do not extend beyond the model like in Submodel 1. That effect will not cast shadows etc.
It's very obvious at the end of the show when looking at both submodels from the side. Check out the brick texture on Submodel 1 to the right, it extends beyond the model. The pitted metal texture on the left Submodel 2 does not.
So why not use the "Displacment"-effect all the time? As to everything in life, there are tradeoffs. One thing that can create issues is with "Displacement size". If you need to crank it up inside BluffTitler, it will separate the polygons of the model and create gaps. It can be tuned with the "FX Displacement setting" but it's not ideal. That is why I adjust the strength of the texture displacement maps with external software before pulling them into BluffTitler.
The "Normal"-effect does not have that model gap issue.
There's of course tons and tons more to all of this and I'm sure I have expressed myself wrong up here but so be it. The media files are on the link below. Like before, open up the show in BT and the textures in any software for raster images. Edit the images, save, reload the show and see how the model texture changes. Repeat.
Link: c.mail.com...
Regards
PiPPi


Like everything in life, it's a story of choices and compromises! and your analysis is correct.
In your previous post on this subject, you boast about the unique texture which avoids using sub-objects: it is good for easy use at the expense of an average result due to lack of adjustment for various parts of the object which maybe enough for a sharing for example.
In this post you evolve towards a final object made up of sub-objects with their own texture, the result is much better but requires more work.
See you again at my St Patrick's Day post:
outerspace-software.com...
I had done some small work on your previous post with normal and displacement maps:
drive.google.com...
Cordially.

Alex-Raymond T., 3 years ago
Thanks Alex-Raymond,
Yes, your word "boasting" is correct :) I myself wrote "showing off UV unwrapping" up above here as I was very happy about finally having got UV unwrapping and mapping to actually work.
I knew back then that using submodels is the way to go for a lot of reasons but I needed to test things out. And show off :)
Note that I still use UV unwrapping/mapping outsside BT for setting texture scale, rotation and placement.
I like what you did with the St Patricks shows, thanks for the links to the texture sites.
Regards
PiPPi
PiPPi, 3 years ago

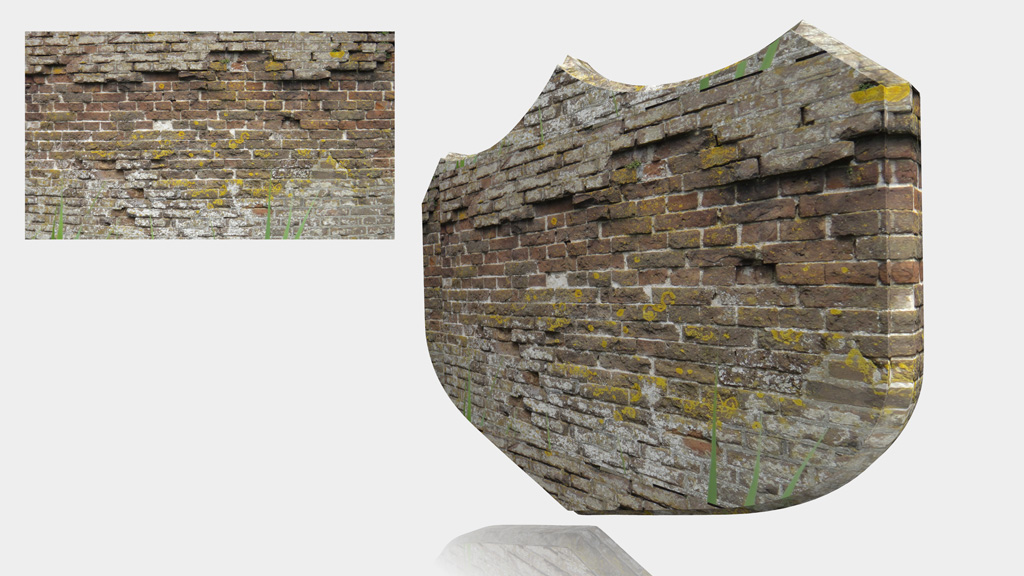
Trying to match reality with PBR is a very interesting challenge, but when you're looking for a quick and easy way to create textures for your intros, never underestimate the power of your camera. Clearly this is totally fake, but it gives you amazing realistic detail. Here's how your model looks like with a photo I took this morning with my phone. I used the Special\UVMapper effect.

michiel, 3 years ago
Michiel,
Yes, when I run into a good looking rusted sheet of metal i take a picture or two. The free texturing software I mentioned comes to good use for that as well.
I should've mentioned it earlier but my example up above was very hard pressed as regards to displacement strength but that was to make things obvious.
I have yet to use what I've learned about the UV stuff for anything real, I get sidetracked every day. I'm currently testing texture baking in C4D to see if that can be carried into BluffTitler.
Regards
PiPPi
PiPPi, 3 years ago


