PiPPi | 2 years ago | 3 comments | 4 likes | 861 views
Decentralized, Tintin, Thor5ten and 1 other like this!
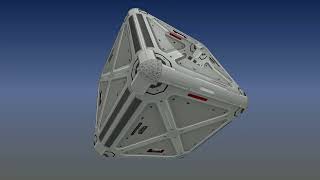
Testing. You can of course do it in a feew different ways but here I used displacement texturing, i.e. a colourmap together with a displacement map and the effect "ColourmapDisplacementmapCubemap.cfx".
Only three files are needed for this one. A vector and two 2D raster images that work together for the 3D texturing effect. They are all in one single layer. I created the vector from scratch, the texture is a free download from textures.com that I have modified to make the features of it fit the vector shape better. And adding The Ugly Shop logo :)
I use that effect without a cubemap, it works best for my purposes. Of course, adding a cubemap to the mix is very easy and makes for some very interesting effects but is overkill for this show.
This opens up lots of possibilities of course. If you can draw vectors and handle raster graphics software, you're in. This is a very basic single EPS but keep in mind that you can use multiple vector layers and combine them to create fairly tricky 3D models and effects without having to use dedicated 3D modeling software.
The people here who know their vector stuff in detail obviously note that "The PiPPi Ugly Shop" logo is not mirrored on the back of the EPS model. The workaround here is to have two identical vector layers and mirror the logo on the "back" layer's displacement map and then play with the transparencies of both layers as they turn.
Regards
PiPPi


Franco,
Thanks. For this show I downloaded free textures from Texture.com and then I modified them with Paintshop.
Sample textures here: textures.com...
I create PBRs from scratch as well and then I use a most fantastic freeware called Materialize.
Video here: youtu.be...
Regards
PiPPi
PiPPi, 2 years ago
Very nice. Maybe this technique can be used to create fancy screens/NFT trading cards by placing a picture, video or colourmap layer in the centre!

michiel, 2 years ago


