
 michiel | 8 years ago | 3 comments | 11 likes | 3.9K views
Filip, ID Production, LostBoyz and 8 others like this!
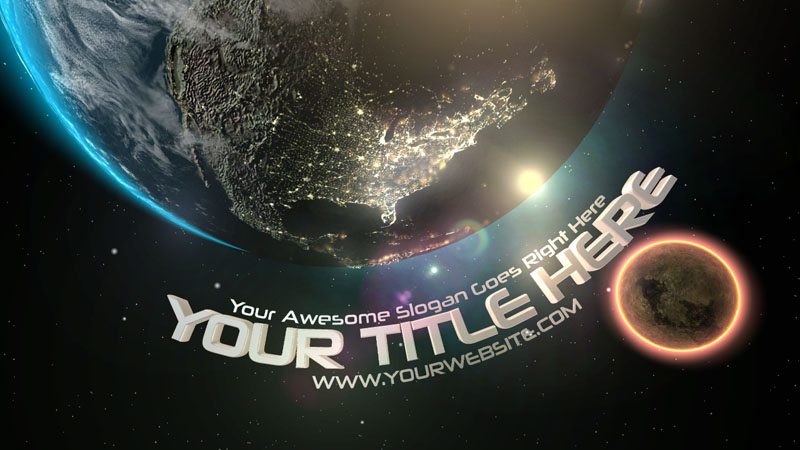
Here's how to model the earth in 7 steps:
Step 1 - Colourmap
The 1st screenshot has been rendered with a picture layer using a colourmap of the earth.
Select the SPHERE style in the 1st dropdown below the textbox to render your picture layer as a sphere.
Use the Lightened effect and set the FX LIGHTING FACTOR property to 1 to make the dark side really dark.
Use the SPECULARITY property to adjust the specular highlight.
And use the POSITION property of the light layer to position the sun.
Step 2 - Displacementmap
The 2nd screenshot uses 2 textures: a colourmap and a displacementmap (multitexturing). The effect used is AdvancedMaterials\ColourmapDisplacementmapReflectionmap.
The effect also accepts a reflectionmap, but this option is not used.
Step 3 - City lights
In the 3rd screenshot a texture of the earth at night has been added. The requires special treatment because it must be bright where the earth is dark. (inverse lighting)
This is conveniently handled by the Earth effect. This effect combines 3 textures: the day colourmap, the night colourmap and the displacement map.
Step 4 - City lights particles
In the 4th screenshot, particles have been attached to the night texture. This adds a nice bloom to the city lights.
The colours and size of the particles can be set with the properties of the particle layer.
The CityLights effect is used to make the particles only visible at the dark side of the earth.
Step 5 - Atmosphere
In the 5th step the atmosphere is added. It is rendered by a separate picture layer using the Atmosphere effect. This allows you to control the height, size and colour of the atmosphere.
Step 6 - Clouds
In the 6th step clouds have been added. This is rendered by yet another picture layer using a B&W picture. By using the AdvancedMaterials\Alphamap effect, the black parts are made transparent.
Since the clouds are rendered with a separate layer, you rotate the clouds independently of the earth.
Step 7 - Stars and nebulae
In the last step, stars and nebulae have been added!
outerspace-software.com...


Great tutorial. Thnx
Filip, 8 years ago
Terrific! Now I know what NASA uses.
Vanlen, 8 years ago
Comment to this article
More by michiel

About michiel
Michiel den Outer is the founder and lead coder of Outerspace Software. He lives in Rotterdam, the Netherlands.
If he isn't busy improving BluffTitler, he is playing the piano or rides the Dutch dikes on his bikes.
810 articles 4.0M views
Contact michiel by using the comment form on this page or at info@outerspace-software.com


