Landscape layer

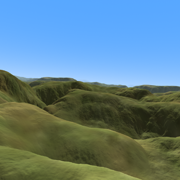
The landscape in the above screenshot is rendered with the landscape layer. The template used is from BixPack 42.
What can I do with the landscape layer?
With the landscape layer you can render landscapes.
How do I add a landscape layer?
Choose LAYER > Add layer > Add landscape layer... to add a new landscape layer.
The new landscape layer can be selected from the layers dropdown to make it the active layer.
Examples
The installer comes with shows demonstrating the possibilities of the landscape layer. Choose FILE > Open show... and select a show from the BluffTitler/Media/Shows/Landscape folder.
To quickly switch between your own shows and the ones that came with the installer, click on the Personal and App buttons in the upper right corner of the file dialog.
Displacement maps
The landscape renders displacement maps (height maps) generated by apps like:

16 bits (HDR) displacement maps
Make sure to export the displacement maps as 16 bits.
Learn more
8 bits (LDR) displacement maps
With 8 bits displacement maps the surface is not smooth. The limited height resolution creates terracing.
Learn moreEffects
The landscape layer needs a displacement map effect. The following effects can be used:
- Displacementmap
- AdvancedMaterials/ColourmapDisplacementmapCubemap
- AdvancedMaterials/ColourmapDisplacementmapReflectionmap

Hardware tessellation
BluffTitler uses DirectX 11 hardware tessellation. This makes small details visible. Control the amount of tessellation with the FX Displacement detail (tessellation) property

Multitexturing
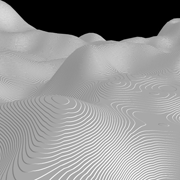
The best results are achieved by combining displacement mapping with colour mapping. Without a colour map, the landscape looks like this.
Learn more
Standing in the landscape
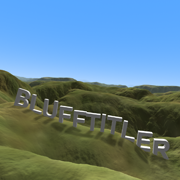
Choose LAYER > Stand in landscape to make your layer stand in the landscape. The vertical position is now relative to the landscape surface.
Landscape layer properties
Position
The position of the landscape.
1st slider: horizontal (x) position
2nd slider: vertical (y) position
3rd slider: depth (z) position
Press <F2> to render the coordinate system.
Size
The size of the landscape.
Colour
The colour of the landscape.
1st slider: red
2nd slider: green
3rd slider: blue
When you press <F3> and the mouse is inside the tool window, the standard Windows colour dialog is presented. When the mouse is outside the tool window, the colour of the current mouse position is copied: it's a colour picker!
Specular colour
The colour used for specular highlights.
1st slider: red
2nd slider: green
3rd slider: blue
When you press <F3> and the mouse is inside the tool window, the standard Windows colour dialog is presented. When the mouse is outside the tool window, the colour of the current mouse position is copied: it's a colour picker!
When this property is (0, 0, 0), the specular light colour is used.
Specularity
The size of the specular highlights.
Set the specular colour with the Specular colour property.
Transparency
The transparency of the landscape.
0 means fully opaque
1 means fully transparent (invisible)
Texture repeat
The number of times the texture is repeated.
Depth bias
This property can be used to solve sorting problems.
Layers have to be sorted according to their distance to the camera. This sometimes goes wrong when using very big, very small or irregular shaped layers. When this happens, use the Depth bias property to fix it.
Tripod size
A higher value makes the rotation of layers standing in the landscape (using the LAYER > Stand in landscape menu item) less sensitive to small details.