Textures and effects

The Change textures and effect dialog is the heart of the app. In this dialog you tell BluffTitler which textures and effect must be used to bring the active layer to life.
What does this dialog set?
The dialog has lots of GUI elements, but only sets 6 things:
- 5 textures
- 1 effect
All are optional. It's perfectly OK for a layer to use no textures and no effect.
How can I display this dialog?
To make sure you do not miss this super important dialog, it can be displayed in 6 different ways:
- Click on the Change texture button
- Click on the Change effect button
- Choose MEDIA > Change texture...
- Choose MEDIA > Change effect...
- Press <F8>
- Press <F9>
- Textures
- Effects
- No map
- Colour map
- Reflection map
- Cube map
- Normal map
- Displacement map
- Metalness map
- Occlusion roughness metalness (ORM) map
- Glow map
- Cartoon map
- Alpha map
- Fur map
- Try to keep textures and effect matched checkbox
- All layers checkbox
- Multitexturing
- Blending techniques
- Post-processing
- Picture codecs
- Video decoding
- Video encoding
Textures

What is a texture?
A texture is a picture pasted onto a 3D model.
How do I apply a texture to the active layer?
Click on the Change texture button, choose MEDIA > Change texture or press <F8>.
Texture sources
BluffTitler can use the following sources as a texture:
- A static picture (JPG, PNG, BMP, TGA,...): click on the Select texture... button.
- An (animated) GIF: click on the Select texture... button.
- A video (WMV, AVI, MPEG, FLV, MOV,...): click on the Select texture... button.
- A texture generated by a colour map layer: click on the Select colour map layer... button.
- A texture generated by a cube map map layer: click on the Select cube map layer... button.
- A QR code: click on the QR... button.
- A webcam: click on the Webcam... button.
Download and stream from the internet
Textures can be downloaded from the internet by entering an URL starting with https://. For example:
https://www.outerspace-software.com/images/blufftitler/blufftitler.png
Videos are streamed when you mark the Stream video and audio streams from the internet checkbox in the Internet and caching tab of the SETTINGS > Options... dialog.
Effects
What is an effect?
An effect tells BluffTitler how to render the layer using the textures. BluffTitler effects are stored in files with the extension CFX, which stands for compiled effect. The installer comes with hundreds of effects that can be found in the BluffTitler/Media/Effects folder.
How do I apply an effect to the active layer?
Click on the Change effect button, choose MEDIA > Change effect or press <F9>.
Effects, shaders & FX
Effects contain vertex, pixel and other shader types. Shaders are small apps that run on your graphics card. For this reason effects are also called shaders. And effect(s) is sometimes written as FX.
Effects and textures
Effects work in close cooperation with textures. For example the Reflectionmap effect requires a reflection map. This is the reason why the textures and the effect are set in the same dialog.
FX properties
Some effects add new properties to a layer. Effect properties can be recognised by the FX prefix. For example the Reflectionmap effect adds the FX Lighting factor property to your layer.
No map
It is important to realize that it is not always necessary to use a texture. Many effects work perfectly without a texture.
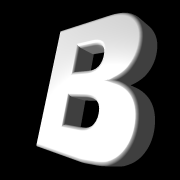
A 3D text without a texture looks like this. The effect used is Lightened.
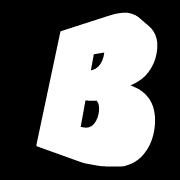
The NotLightened effect turns off all lighting. It is very useful for background pictures.
Colour map
What is a colour map?
Colour mapping is the most basic type of texture mapping. The picture is simply pasted on the 3D model without adjustments.
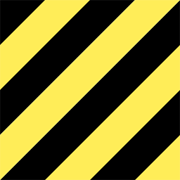
This is how a colour map looks like in a paint app.
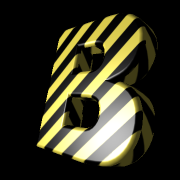
This is how the same colour map looks like pasted on a text. The effect used is Lightened.
What are other names for a colour map?
A colour map is also called a diffuse map, a picture map, an albedo map or simply a texture map
How do I make a colour map?
Use your camera or your paint app like Photoshop or PaintShop.
Tools to generate colour maps are Filter Forge, Substance, Genetica, Materialize and PixPlant.
Colour map layer
Next to loading colour maps from files, BluffTitler can also use colour maps generated by the colour map layer. Learn more
Which effects support colour mapping?
Some of the effects that use a colour map are:
- Lightened
- NotLightened
- NotLightened_Additive
Reflection map
What is a reflection map?
Reflection mapping is a trick to create reflections. Instead of computing the real reflections, which is very slow, the reflections are taken from a picture that contains the reflections in all directions.
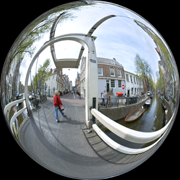
A correct reflection map (sphere map) looks like this.
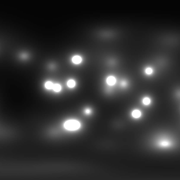
In practice, pictures like this are used as reflection maps. This picture is not a correct sphere map, but is much easier to create and produces great results. Don't be afraid to use ordinary pictures and photos as reflection maps.
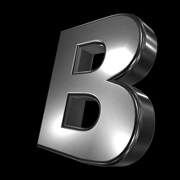
Applied as a reflection map, the result looks like this. The effect used is Reflectionmap.
What are other names for a reflection map?
Reflection mapping and environment mapping are general names for all techniques storing the reflections in a texture. The technical term for what BluffTitler calls a reflection map is a sphere map.
How do I make a reflection map?
You can use Bixorama to convert 360° photos in various formats to reflection maps.
Normal pictures and photos work surprisingly well as reflectionsmaps so don't be afraid of experimenting. When using normal photos don't forget to unmark the Try to keep textures and effect matched checkbox to turn off the associations.
Which effects support reflection mapping?
Some of the effects that use a reflection map are:
- Reflectionmap
- AdvancedMaterials/ColourmapReflectionmap
- AdvancedMaterials/Reflectionmap_Additive
Cube map
What is a cube map?
Cube mapping does the same as reflection mapping, only in a better quality. A cube map contains 6 squares, representing the 6 faces of a cube. BluffTitler accepts cube maps in the DDS format.
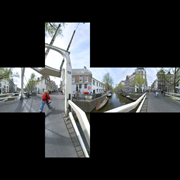
A cube map contains the 6 faces of a cube.
The texture used is Textures/CubeMap.dds.
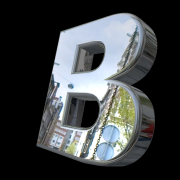
This is how this cube map looks like rendered on a text. The effect used is Cubemap.
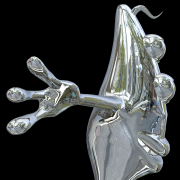
The fun starts when you apply cube maps to 3D models!
How do I make a cube map?
Bixorama can be used to convert 360° photos in various formats to the DDS format.
NVIDIA offers a Photoshop plugin to create cube maps.
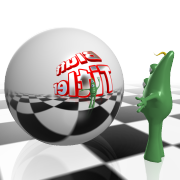
Cube map layer
Next to loading cube maps from DDS files, BluffTitler can also use cube maps generated by the cube map layer. In this screenshot you can see a text, a model and a mirror layer being reflected into a sphere.
To save the generated cube map, select the cube map layer and choose FILE > export as picture....
Learn more
Which effects support cube mapping?
Some of the effects that use a cube map are:
- Cubemap
- AdvancedMaterials/PBR
- AdvancedMaterials/ColourmapCubemap
- AdvancedMaterials/Cubemap_Additive
Normal map
What is a normal map?
A normal map contains the surface normals (vectors perpendicular to the surface). It is used to simulate bumps. The normals are encoded in the red, green and blue colour components. The neutral value is (128, 128, 255), or alternatively a transparent pixel.
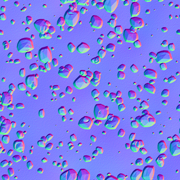
A normal map looks like this.
The texture used is Textures/Pebbles_Normalmap.png.
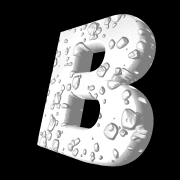
This is how this normal map looks like rendered on a text. The effect used is Normalmap.
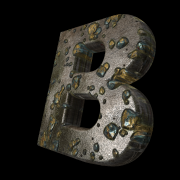
The fun starts when you combine normal mapping with colour and cube mapping. This text has been rendered with the AdvancedMaterials/ColourmapNormalmapCubemap effect.
Learn more
What are other names for a normal map?
Normal mapping is sometimes called bump mapping. This is confusing because displacement mapping is also sometimes called bump mapping.
How do I make a normal map?
Our favorite tools are Filter Forge, Substance, Genetica, Materialize and PixPlant. NVIDIA offers a Photoshop plugin to create normal maps.
Which effects support normal mapping?
Some of the effects that use a normal map are:
- Normalmap
- AdvancedMaterials/ColourmapNormalmapReflectionmap
- AdvancedMaterials/ColourmapNormalmapCubemap
Displacement map
What is a displacement map?
A displacement map is a greyscale picture describing the heights of the surface. Black is low and white is high. In contrast to normal mapping that simulates bumps by changing the lighting, displacement mapping also changes the geometry of the surface. This is more expensive, but gives a more realistic result.
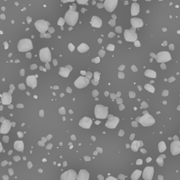
A displacement map looks like this.
The texture used is Textures/Pebbles_Displacementmap.png.
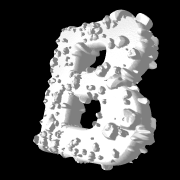
This is how this displacement map looks like rendered on a text. The effect used is Displacementmap.
Compare this picture with the normal map.
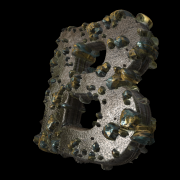
The fun starts when you combine displacement mapping with colour and cube mapping. This text has been rendered with the AdvancedMaterials/ColourmapDisplacementmapCubemap effect.
Learn more
What are other names for a displacement map?
A displacement map is also called a height map, height field, relief map or bump map. This is confusing because normal mapping is also sometimes called bump mapping.
How do I make a displacement map?
Our favorite tools are Filter Forge, Substance, Materialize and PixPlant.
HDR
To prevent the terracing effect when rendering landscapes with height maps, make sure your height map is in a HDR format.
Which effects support displacement mapping?
Some of the effects that use a displacement map are:
- Displacementmap
- AdvancedMaterials/ColourmapDisplacementmapReflectionmap
- AdvancedMaterials/ColourmapDisplacementmapCubemap
Metalness map
A metalness map is a greyscale picture: black means non-metal, white means metal. It does the same as the metal part of the ORM map.
Which effects support metalness mapping?
- Filters/ColourmapCubemap
- Filters/ColourmapReflectionmap
- AdvancedMaterials/UVMapper
- AdvancedMaterials/NormalMapper
- Special/FragmentExplosion
- Model/TPose
Occlusion roughness metalness (ORM) map
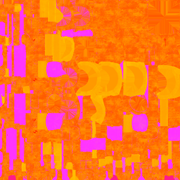
What is an occlusion roughness metalness map?
An occlusion roughness metalness map (ORM map), is a composite texture, describing an advanced material. It's an important part of physically based rendering (PBR).
It's 3 textures in one:
1) Occlusion map
The red channel contains the ambient occlusion (AO) map. This controls indirect lighting. 0 means no indirect lighting (dark) and 255 means full indirect lighting (bright).
2) Roughness map
The green channel contains the roughness map. This sets the roughness of the material. 0 means smooth/glossy and 255 means rough.
3) Metalness map
The blue channel contains the metalness map. This sets the metalness of the material. 0 means non-metal, 255 means metal.
Default value
The default value is white (255, 255, 255).
Which effects support ORM mapping?
- AdvancedMaterials/PBR
How do I make an ORM map?
Because it's 3 textures in one, it's difficult to edit ORM maps. They are mostly generated ("baked") by 3D modelling tools when exporting as a GLB file. When BluffTitler loads such a model, it automatically loads it in the 4th texture slot and selects the PBR effect. Learn more
The System/TextureMakerORM effect can be used as an alternative for using a paint app to build an ORM map out of 3 separate textures.
Roughness metalness overview
The roughness metalness model is an alternative to the specularity model. Here's how this looks like:
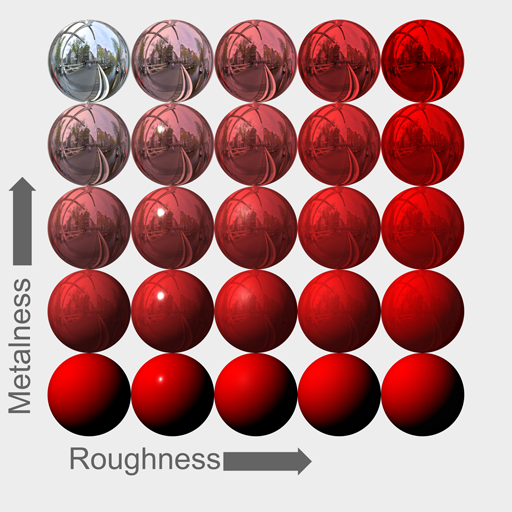
The roughness and metalness values can be set in 3 different ways:
- Per pixel, stored in the ORM map
- Per submodel, stored in the model (only applied if no ORM map is used)
- Per layer, with the FX Roughness, Metalness property of the PBR effect (only applied if this property is not set to (-1, -1))
Glow map

What is a glow map?
A glow map makes part of the colour map glow. It's rendered with additive blending, so black means no glow.
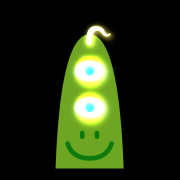
In this example the glow map adds glow to the eyes and the hair.
What are other names for a glow map?
A glow map is also called an emissive map.
How do I make a glow map?
Glow maps can be made in any paint app.
Which effects support a glow map?
Some of the effects that use a glow map are:
- NotLightened
- Lightened
- AdvancedMaterials/PBR
When a 3D model features a glow map, it is placed in the 5th texture slot. For this reason, all the supporting effects accept a glow map in the 5th texture slot. Learn more
Glow properties
Fine-tune the glow with the glow properties of the camera layer.
Glow without a glow map
Mark the Glow checkbox in the LAYER > Active layer properties... dialog to glow the whole layer.
Cartoon map
What is a cartoon map?
A cartoon map contains a horizontal gradient used for custom lighting. It is called a cartoon map because an old hand drawn cartoon can be imitated by using a gradient with only a few colours.

A cartoon map looks like this.

This is how this cartoon map looks like rendered on a text. The effect used is Cartoonmap.
What are other names for a cartoon map?
A cartoon map is also called a toon map.
How do I make a cartoon map?
Cartoon maps can easily be made in Photoshop with the gradient tool.
Which effects use cartoon mapping?
Some of the effects that use a cartoon map are:
- Cartoonmap
- Text/RainbowText
Alpha map
What is an alpha map?
An alpha map is a greyscale picture describing the alpha channel (transparency) of the surface. Black is fully transparent and white fully opaque.

An alpha map looks like this.
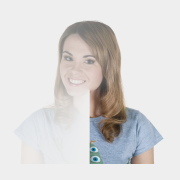
The Filters/Alphamap effect uses an alpha map to change the alpha channel of a picture.
What are other names for an alpha map?
An alpha map is also called a transparency map or an opacity map.
How do I make an alpha map?
Alpha maps can be made in any paint app.
Which effects use alpha mapping?
Some of the effects that use an alpha map are:
- AdvancedMaterials/Alphamap
Other uses of the alpha map
Next to describing the alpha channel, greyscale pictures can be used for many other things. Here are some examples:
The Camera/CameraBloom effect uses an alpha map to set the amount of bloom.
The Filters/Blur effect uses an alpha map to set the amount of blur.
The Filters/GradientWipe effect uses an alpha map to describe the transition effect.
Fur map
What is a fur map?
A fur map is used to simulate hairy surfaces. A transparent pixel means no hair, and an opaque pixel a hair.
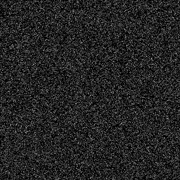
A fur map looks like this.
The texture used is Textures/Fur.png.
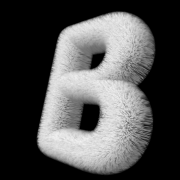
This is how this fur map looks like rendered on a text.
The effect used is AdvancedMaterials/Fur.
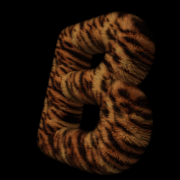
The fun starts when you combine fur mapping with colour mapping. In this example a tiger texture is used.
The effect used is AdvancedMaterials/Fur.
How do I make a fur map?
Use your favorite paint app.
Which effects support fur mapping?
Some of the effects that use a fur map are:
- AdvancedMaterials/Fur
Try to keep textures and effect matched checkbox
Effects work in close cooperation with textures. For example the Reflectionmap effect requires a reflection map.
For convenience BluffTitler associates texture filenames with effects.
For example if you load a texture containing the word reflection (as in ReflectionMap_Silver.jpg), BluffTitler automatically loads the Reflectionmap effect.
| Part of the texture filename | Associated effect |
| colourmap or diffusemap | Lightened |
| reflection or spheremap | Reflectionmap |
| cube and .dds | Cubemap |
| normal | Normalmap |
| displacement, heightmap or bump | Displacementmap |
| cartoon or gradient | Cartoonmap |
Default textures
When you select a new effect, the default textures are selected in the 4 texture slots. For example when you select the Reflectionmap effect, the 1st texture is set to ReflectionMap_Silver.jpg because the effect wants a reflection map in the 1st texture slot and this is the default reflection map.
Use your own default textures
Set the default textures in the Default textures tab of the SETTINGS > Options dialog.
Turn this system off by unmarking the Try to keep textures and effect matched checkbox.
All layers checkbox
When the All layers checkbox on the tool window is marked, the textures and effect of all layers of the same layer type as the active layer are set.
When you hold down the <Ctrl> key when clicking on the OK button, only the textures and effect of the other layers are set that are changed in the active layer.
Multitexturing
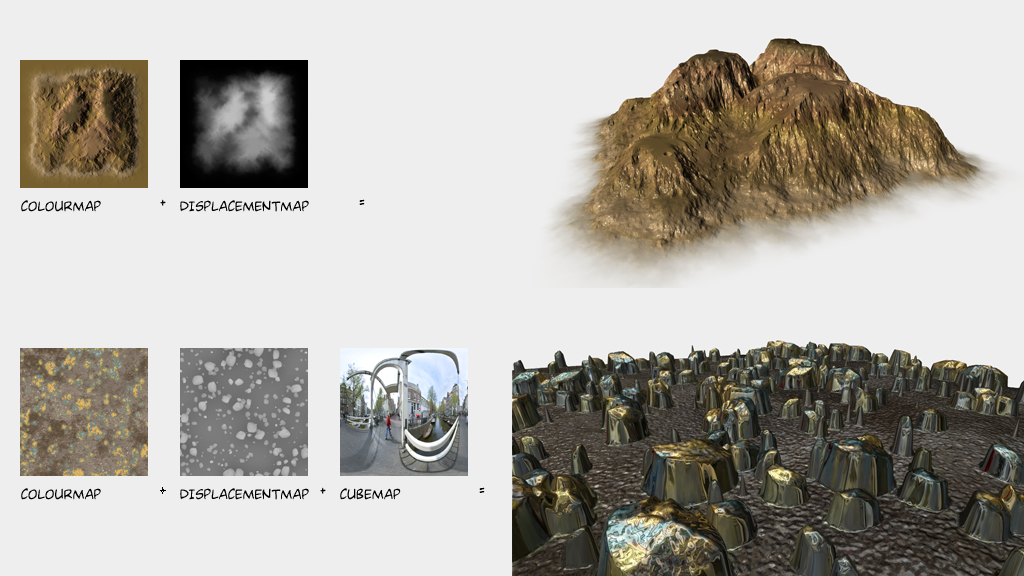
Some effects use 2, 3, 4 or even 5 textures. This is called multitexturing.
For example the AdvancedMaterials/ColourmapDisplacementmapCubemap effect combines colour mapping with displacement mapping and cube mapping.
You do not have to use all supported textures. Effects are smart enough to turn off a part of the effect when the required texture is missing.
Blending techniques
BluffTitler effects support the following blending techniques:

Alpha blending
With alpha blending, your texture needs an alpha channel. This is the default blending mode supported by most effects.

Additive blending
With additive blending, the colour of your layer is added to the colour of the background. This way, black is transparent and brighter colours are rendered with extra brightness. This works great with particles.
The effect used in this example is NotLightened_Additive.
The Flare effect also renders your layer with additive blending. It offers a few extra FX properties.

Subtractive blending
With subtractive blending, the colour of your layer is subtracted from the background. This way, black is transparent and brighter colours make the background darker.
The effect used in this example is NotLightened_Subtractive.
Post-processing
When you apply an effect to the camera layer, the render output is used as the 1st texture. This way the effect can be used as a post-processing effect.
Effects specifically designed for use in the camera layer can be found in the Effects/Camera folder.
The effects in the Effects/Filters folder also work great applied to the camera layer.
Picture codecs
BluffTitler uses Windows Imaging Component (WIC) to import and export picture files. This means that BluffTitler can use any picture format if there's a compatible WIC codec installed.
By default, Windows comes with codecs for the JPEG, TIFF, GIF, PNG and BMP formats. For other formats you might have to install a new codec.
FastPictureViewer Codec Pack
FastPictureViewer Codec Pack offers a huge collection of picture codecs. With this pack, BluffTitler can import EXR and HDR files.
Inspect picture codecs
Choose the WIC tab in the <Ctrl><F1> dialog for a list of all WIC codecs installed on your system.
Video decoding
Video decoding is used when you play a compressed video file inside BluffTitler, for example with a video layer.
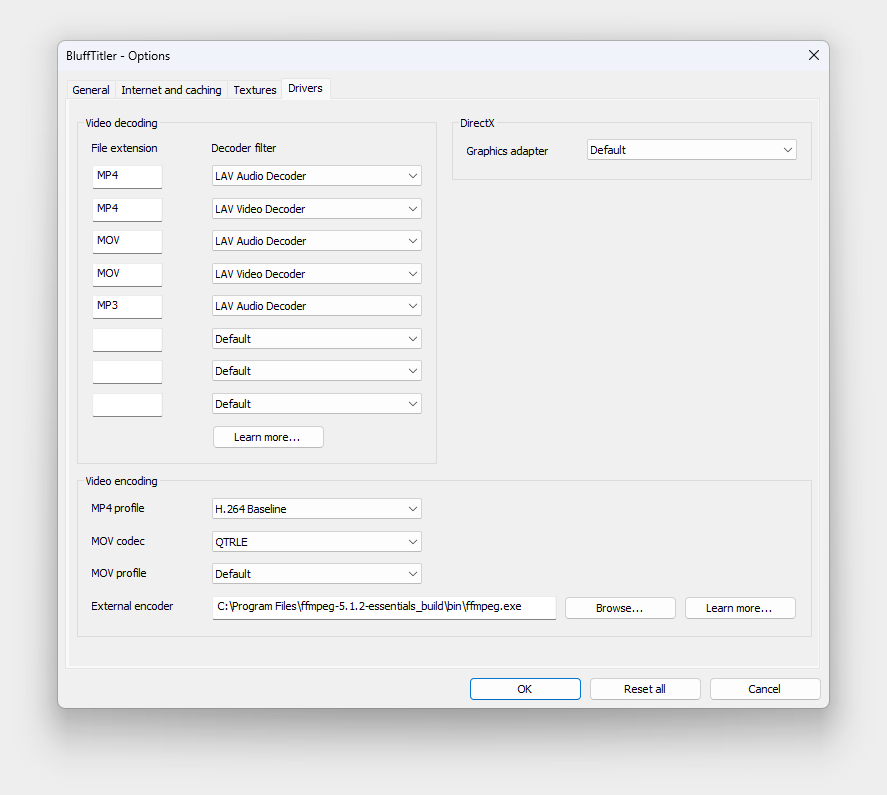
Display this dialog by choosing SETTINGS > Options... and selecting its Drivers tab.
BluffTitler uses DirectShow to play video and audio files. This means that BluffTitler can use any video and audio format if there's a compatible DirectShow decoder filter (also called a codec or a source filter) installed. By default, Windows comes with codecs for the WMV, AVI and MP3 formats. For others you might have to install a new codec.
K-Lite Codec Pack
K-Lite Codec Pack offers a huge collection of DirectShow decoder filters. With this codec pack, BluffTitler can play MP4, WebM, MOV, M4A and OPUS files.
Fixing codec conflicts
You can force BluffTitler to use a specific codec for a specific file extension. For example, select the LAV Video Decoder codec for the MP4 format.
For video files you can define 2 codecs: one for the video and one for the audio stream. For example, select both the LAV Video Decoder and LAV Audio Decoder codecs for the MP4 format.
Video encoding
Video encoding is used when you export a show as a compressed video file with the menu item FILE > Export as video...

Display this dialog by choosing SETTINGS > Options... and selecting its Drivers tab.
External encoder
BluffTitler supports the following external video encoders:
FFmpeg
If the FFmpeg encoder is selected, it is used to export as MP4. It works on Windows 7 and has no problems with 4K.
FFmpeg also adds the following features:
- Export as WebM, WMV, QuickTime MOV and Animated GIF is enabled in the FILE > Export as video... dialog
- Video thumbnails are rendered in the MEDIA > Change texture... and EDIT > Change all textures... dialogs
- Recognition of the alpha channel of QuickTime MOVs by the video layer
To install FFmpeg:
- Visit ffmpeg.org
- Click on the Download button
- Click on the Windows logo
- Click on a Windows builds location under the Windows EXE Files section
- Download one of the Release essentials, in ZIP or 7Z format
- Unpack the ZIP or 7Z file. Use WinZip to unpack 7Z
- Move the unpacked folder to the C:\Program Files\ folder
- Start BluffTitler, choose SETTINGS > Options... and select the Drivers tab
- Select C:\Program Files\ffmpeg-X.X.X-...\bin\ffmpeg.exe as the External encoder
Other external encoders
Support for more external encoders is in preparation. Do not hesitate to contact us for requests.