Buttons
Click on the area that interests you:

The textbox
This edit box is used by the text and scroller layers. This is the place where you type the text you want to animate.
The following tags can be used for special effects:
<123 />, <ABC />, <abc />, <ampm />, <appname />, <computername />, <countdown />, <counter />, <day />, <fps />, <fullday />, <fullmonth />, <hour />, <hour12 />, <millisecond />, <minute />, <month />, <year />, <particles />, <flashes />, <second />, <showpath />, <showtime />, <showtitle />, <time />, <timer />, <version />
The following tags can be used to update your Happy New Year cards automatically:
<nextyear />, <nextyearX--- />, <nextyear-X-- />, <nextyear--X- />, <nextyear---X />, <nextyearXX-- />, <nextyear--XX />
The <counter /> tag is used in the text layer where it renders the number as set with the Counter property.
The 3 layer style dropdowns
You can find the 3 layer style dropdowns below the textbox on the left side of the tool window. Every layer has its own styles: for example the text layer uses the 1st dropdown to set the composition while the picture layer uses the same dropdown to set the shape.
The all layers and all keys checkboxes
Read an in depth tutorial of these boxes
The properties dropdown
All properties that can be animated are listed in the dropdown above the 3 sliders. The property itself can be edited with the 3 sliders below this box. A plus sign (+) is added to the property name when it is animated.
The 3 property sliders
The result of dragging those sliders depends on the active property, set by the dropdown above them.
For example when you select Text position on the text layer, the 1st slider controls the horizontal, the 2nd the vertical and the 3rd the depth position. When editing colours, the 3 sliders represent the red, green and blue components.
You can move the 3 sliders at the same time by holding down the <Ctrl> key while moving the 1st slider.
The reset button
With this button you reset the 3 sliders to their default position. Clicking on this button with the <Shift> key pressed resets all properties.
The 3 property edit boxes
With the text edit boxes next to the 3 sliders you can enter values that are outside the range of the sliders.
The layers dropdown

This is the big dropdown above the Play button. Shows are built out of layers. Every layer can be animated independently. Use this dropdown to select the layer you want to edit. A plus sign (+) is added to the layer name when it is animated.
The physics dropdown
This box is used to select the tweening method. This is the way the positions in between the keyframes are computed. You can use these effects to simulate physics effects. Learn more
The visible checkbox
Layers can be turned visible/invisible with this checkbox. When you make a layer invisible, all child layers are invisible as well.
The first key button
Jumps to the start of the show.
The previous key button
Jumps to the previous keyframe.
The next key button
Jumps to the next keyframe.
The last key button
Jumps to the end of the show.
The play button
Starts playing the show from the current position. You can also press <F4>.
When using a playlist, hold down the <Ctrl> key to play only the active slide.
The create key button
Creates a keyframe.
The delete key button
Deletes the current keyframe. Use the Previous key and Next key buttons to select a key. A key can also be selected by clicking on it.
Clicking on this button with the <Shift> key pressed deletes all keyframes.
The copy key button
Copies the current key into the clipboard. Every layer has its own clipboard, so do not worry about mixing up layers.
The paste key button
Copies the clipboard to the current time and makes a keyframe out of it.
The move key to the left button
Moves the current key to the left. You can also click and drag the keyframe. When no key is selected the time is moved to the left. When holding down the <Shift> key, the key is moved 0.1 second instead of a millisecond.
The move Key to the right button
Moves the current key to the right. You can also click and drag the keyframe. When no key is selected the time is moved to the right. When holding down the <Shift> key, the key is moved 0.1 second instead of a millisecond.
The insert time button
When you press this button, all keys greater than the current time are moved to the right 0.1 second. When holding down the <Ctrl> key, the key at the current time is also moved. When holding down the <Shift> key, 1 second is inserted. When holding down the <Alt> key, only the keys of the active layer are moved.
The remove time button
When you press this button, all keys greater than the current time are moved to the left 0.1 second. When holding down the <Ctrl> key, the key at the current time is also moved. When holding down the <Shift> key, 1 second is removed. When holding down the <Alt> key, only the keys of the active layer are moved.
Current time
The current time is printed in the following format: minutes : seconds . milliseconds.
Number of keyframes
The number of keyframes is displayed above the keyframes bar.
The keyframes bar
In this bar every keyframe is displayed as a small vertical line. When you click on or very close to a key, the time jumps to the time of that key. You can now copy this key, delete this key or drag this key to another place.
The time slider
This slider indicates the current time. Dragged to the left represents time 0, the beginning of the show. Dragged all the way to the right represents the end of the show. By default shows have a duration of 4 seconds, but you can change this with the menu item FILE > Set show duration....
The all layers and all keys checkboxes
These checkboxes determine what happens when you change something:
Both unmarked
Only the current key is changed. This is the default mode.
All keys marked and All layers unmarked
All keys in the active layer are changed.
Both marked
All keys in all visible layers of the same type are changed.
All layers marked, All keys unmarked
The current keys in all visible layers of the same type are changed.
Examples
Want to change the colour of all keys? Mark All keys and you can use the 3 sliders to edit the colour of all keys at the same time.
Want to change the font of all text layers? Mark All layers before you change one of them.
Want to move all text layers to the same horizontal position? Mark All layers and move one text layer to this position.
Want to add a golden border to all text layers? Mark All layers before choosing LAYER > Attach border to active layer...
For some properties, like the Bevel and Font size in the text layer, the All keys checkbox is automatically marked every time your select this property. The reason for this is that it is expensive to animate them (bevel) or unlikely that you would want to animate them (font size). It is possible to animate those properties by unmarking the All Keys checkbox. When you unmark the Auto mark ALL KEYS checkbox in the SETTINGS > Options... dialog, the All Keys checkbox stays unmarked for those properties.
Physics effects
With the dropdown to the right of the layers dropdown you can set the tweening method. This is the way the positions in between the keyframes are computed. You can use these effects to simulate physics effects.
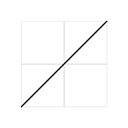 | Constant speed |
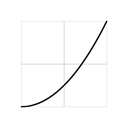 | Accelerate |
 | Accelerate slow |
 | Decelerate |
 | Decelerate slow |
 | Accelerate and decelerate |
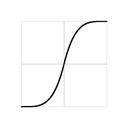 | Accelerate and decelerate slow |
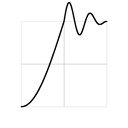 | Damper |
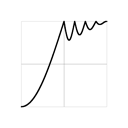 | Bouncer |
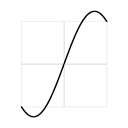 | Outside |
 | Pumping |
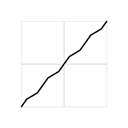 | Zig zag |
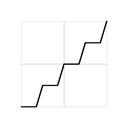 | Robotic |
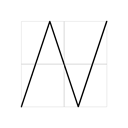 | Pingpong |
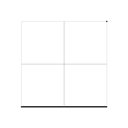 | No animation |
Spline effects
With the dropdown to the right of the layers dropdown you can select 4 spline types.

No spline
The example path uses 6 keyframes.

Bezier
The Bezier spline respects the first and the last keyframe and everything in between is smoothed.
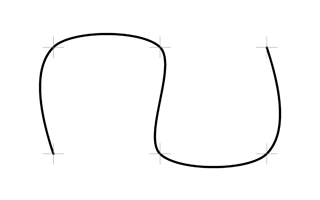
Overhauser
The Overhauser spline goes through all the keyframes and exaggerates the curve.

Hulshoff
The Hulshoff spline only smooths the path around the keyframes.

Hulshoff smooth
The smooth version smooths a bigger area around the keyframes.